7 February 2011

Another heart

I've got a heart like this in my shop but this one isn't there!!!  This is for a returning customer who works in our Post Office. 

The staff at the post office are always curious as to what I'm mailing abroad and this lady one day was puzzled as the package 'stuck' slightly to her counter top.  She said if felt as if it was magnetic.  Thus the conversation was started.  I took a butterfly down to show her  few days later and she bought that and then ordered a heart.  

Oh, must tell you a story.  On Saturday Sally and I were looking through the clothes racks in a local shop and she spotted a nice top.  I pointed out that it had three quarter sleeves to which Sally said that was fine.  Then out of my poor old mouth came - 'hmmm, spose it would be OK for me too as I've only got three quarter arms'.  Never thought about it until a woman nearby burst out laughing.  It's true, though, my arms are short and long sleeved things are always waaaaay too long and fall off the edge!!

5 February 2011

Jane's chokers

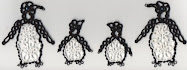
Woweeeee, look at these.

They're from Jane and I asked her if she'd got a pattern cause I just knew you guys 'out  there' in tat land would absolutely NEED it.  Here it is:-

Black and brights choker
Materials : 2 size 20 threads, one  rainbow bright and the other black; 2 shuttles; 2 clasps, 282 bright seed beads.
Abbreviations : CTM, continuous thread method; ds, double stitch; p, picot; lp, long picot; SR, split ring
+B, add 3 beads to long picot before joining
Foundation Row:
Wind 2 shuttles CTM, need both shuttles to be almost full.
SR1, using shuttle 1: 8/lp(or attach jump ring for fastening)8
SR2, using shuttle 2: 8/8
Begin the split rings with alternate shuttles in order to keep the colours same on each split ring.
Do 46 split rings in this way.
On the 47th ring, attach a clasp. I do a Single shuttle split ring for this ring, hiding the thread from shuttle 2 in the first half of the ring, which saves having to thread in the ends.
Top black row
Wind 2 shuttles CTM with black thread.
SR1: 1ds, lp(long enough to hold 3 beads) 4ds, lp, 3ds/7ds. Before closing the split ring, put the foundation row upwards through the ring. Close.
SR2: 4ds, 2 lp, 3ds/7 Before closing ring, put the foundation row downwards through the ring. Close.
Note: the second half of the SR should have one less ds than the first half, the first half should have 2 long picots in the centre of  the 8ds.
Continue in this way, weaving the foundation row up and down before closing each SR to the last SR.
SR 47: 4ds, lp, 3ds, lp 1ds/7ds
 Close the final SR. Tie and cut and hide the ends.
Foundation Row
Make another foundation row, the same as before.
Bottom Black Row
Wind 2 shuttles CTM.
SR1: 1ds, +B, 4ds, +B, 3ds/9 Before closing the split ring, put the foundation row upwards through the ring. Close.
SR2: 4ds, +B, +B, 3ds/9 Before closing the split ring, put the foundation row downwards through the ring. Close.
Note, there is one more ds on second half of the split ring. Continue in this way, weaving the foundation row up and down before closing each split ring. Tie and cut and hide ends.
I used the same method for all the necklaces, only using different beads and colours.

4 February 2011

A very special bookmark

Here is the penultimate link - day 9.  I will be very busy over the weekend so I'm going to keep the last one until Monday morning.  Sorry about that but little sisters come first!!

This bookmark is very special.  It's Nick's.  

Last year as part of his birthday present I bought some magnetic bookmarks from Waterstones.  Just a sort of 'stocking filler' present.  

It was as I was walking back from town that the whole idea of making tatted ones started germinating in my mind and thus they became a small (but growing) section of my Etsy shop!!!!

Sadly last week I returned a book to the library for him with one of the small  Waterstones bookmarks left on it so felt I needed to make him a new one.  Actually he asked as he was getting jealous of all the others flying out of the house!!  This is the badger head (FLAT, not 3D).  Nick loves badgers.

Now him being him - he doesn't use it as I designed it to be used!!!!  He's got a better idea and I'll admit one I hadn't thought of!!!  He puts the two magnets either side of the front or back covers of the book and then uses the head on the dangly tail to mark the actual place he's reached inside.  He's wickedly clever is that old git!!!!!  

3 February 2011

Final bead talk!!

First of all - another package posted on 14th or 15th December (that's LAST year!) has now arrived in the USA.

Now how to add beads another way.

I think it must've been as a result of something that somebody said on a blog somewhere about Rhoda Auld's method of adding beads which got the old brain working.  

I remember that moment when I was making something just a few years ago which needed the mental capacity to work out not only 'how many' but also 'what order' to add the beads to the threads before starting and it was a LOT of beads too.  I just wasn't coping well with that concept - I've never had a good brain for that sort of thing.  Then it occurred to me that perhaps I could add the beads when I 'got there' - like Rhoda did but differently so that they didn't have the thread over the sides of the beads (see yesterday's post).

This (after probably around 50 years of tatting) was a huge moment for me.  I'd not seen this idea used before.

So, this is how it's done.  When you get to the place that needs a whole lot of beads on a picot (or what I call a LBP - long beaded picot) you add the beads to the back of the hand above the last doubles and put a safety pin/paperclip to hold them in place.  Then continue with the pattern and join to the LBP when required.  This gives you the opportunity to experiment with colours, sizes and different orders of beads too.

Here are a couple of quick pictures but there is a link here with more explanation.


I was SO thrilled when seeing the TIAS pieces coming in that this idea has been adopted for making picots to fit even just one bead.  My first thoughts were to put this in the TIAS instructions but I didn't want to 'frighten off' participants who had recently learnt to tat.

2 February 2011

More about beads!!!

Before starting - day 8 is out now and can be found here.

A few people choose to add beads to their tatting after completion.  I've never understood this as the sewing thread could so easily come undone.  When I do something I like it to 'stay done' and not fall apart!!  With a little planning and good instructions it's so easy to add beads into the work as the piece is made.

There are several ways of using beads in your work - at the top of the picot (that is, included in the picot itself) is probably the first method that comes to mind.

This needs a bit of 'planning'.  Patterns should tell you to add the beads either to the shuttle or chain threads (sometimes both) and the quantity before starting.  When the element (ring, chain, split ring or whatever) is reached that needs the bead then some patterns will instruct you to move the bead to the back of your hand before starting the next part.  Always read the instructions before starting each element - just in case!!!  When annotating patterns I tend to use B as the instruction for a bead used like this (see below) with the 'move B to back of hand before starting ring' at the end of the previous element.  Sometimes I forget, though.
If the bead is to lie between the doubles then it stays on the shuttle thread until required by the pattern's instructions.  Then it's just moved along the core thread to sit there happily between it's two doubles!!!  Like this picture below.  In this case I use the instructions MB (move bead).  This is perhaps the easiest way of using beads but does leave a thread over the top.  Useful effect for some patterns and very useful for placing 'eyes' in critter designs!!!

Combining the top two methods (on and in a picot) gives some interesting effects like the sample shown below.  There are other combinations too.

Another way of adding beads is one  I first found in 1974 when I bought (new as just published!!!) Rhoda Auld's book.  This is what I've always thought of as the 'lazy way' of adding beads!!!  Why lazy?  Well, no planning is needed!!!  When you feel you want or need a bead you add it to the thread round your hand, take the shuttle thread through the loop coming out of the top of the bead and then snug up the thread.  I  think the result is ugly.  I've never liked the threads showing over my beads so soon after using that method I abandoned it.  This is how it's done!!
And this is what it looks like when finished!  Not my cuppa tea!!!!  I found that the thread round the bead 'snagged' on things too.

Tomorrow I'll be talking my final (probably!) talk about beads in tatting.

1 February 2011

A 'How To' page

Before I start - another packet has arrived with it's new owner.  This was mailed on the 14th December.  Long live Royal Fail!!!!!!

Today will be the first of three posts which will be talking about beads.  These will be serious posts and will probably interest those who are reluctant to use beads!!!

I think the first time I ever added beads to my tatting was onto picots.  That is 'ready made' picots.  Like this!!!  
During the TIAS there was somebody who was having trouble adding her beads to the picots.  Now this is a problem and one which we've all met at sometime or another.  I use two different methods - depending on my mood and the size of the bead/thread.  

The first way is using a very, very small crochet hook (my favourites of all time are from Georgia Seitz cause they're short and have a chain and cover on them).  The size I use is 0.4mm.  The bead is put on the hook, the hook through the picot and the bead slipped over the thread and thus onto the picot.  Then the join is made.

If the hole in the bead is too small then I use a beading needle and some sewing thread and do it this way.  I take the needle through the bead and slip the bead onto the thread.  Then I take the needle through the picot then back through the bead.  All I do then is slide the bead onto the picot.  Job done!!!!


Creative Commons Licence

Happy Beaks

Happy Beaks
I beg your pardon? I didn't quite catch what you said.