No I'm not fixated on these but really want to get a few done for my stash. This is back to the Flowery one which can be found here.
5 November 2021

4 November 2021
More and more!!
Having made about half of the leaves required for Nita I'm now thinking of making some for myself to turn into a necklace. I'll use oranges and browns to make a bit of a change of colour!!!
If I get started at about half past seven in the evening I can make two leaves before bedtime!!
To follow this pattern I use the pdf file on my iPad and follow the lines round using 'markup'. I rub the pencil out when I've finished and that's the end of that!!! Also for the last chain I use this method which leaves me with just one end to sew in and no knots!!!
I’ve been asked about the idea of converting jeans into a skirt and have found if you put in a Google search there are several Youtube videos including this one and also this tutorial on Wikihow.

3 November 2021
A thank you
Well at the last minute I changed my mind and last Friday's bookmark is still with me!! The pattern for this one is here.
Instead I made one out of the threads that the lady gave me. I think she was quite surprised.

2 November 2021
More of the same
BUT different colours.
I gave you the link to the basic pattern by Ruth Scharf yesterday but here it is again.
I've been asked for about a dozen of these leaves by a friend who lives in Tasmania. Yes, they'll be going round to t'other side of the planet!!!
She's converting a pair of jeans into a skirt and wants to add these to it. I've done her a couple of leaves in the past for another project of hers but this amended pattern (thank you, Judith) is a delight to work.
Now you can guess what I'll be doing sometime in the future. Yes, converting jeans to skirts!!!! Well, one pair anyway!!!
Here are the day before yesterday's leaves along with yesterday's!!! Things are rocking and rolling along!

1 November 2021
Monday moan
Today's moan isn't so much a moan but a groan!!!
Back in ancient history, when I learned to tat, the old Penelope and Coats booklets never told the tatter how much thread they needed to wind onto the shuttles to make the design. In 'those' days they hedged their bets and often put 'two balls of ......' and left it at that.
Remember that back in those days too you were never told to use two shuttles. Why? Well because split rings hadn't come into general use so two shuttles weren't needed. After all, what's wrong with a shuttle and a ball if that's all you actually need Oh, one thing I might add here is that if you're going to keep dropping the ball and it keeps running away then perhaps the ball thread wound onto a shuttle will solve that problem!!!
I feel nowadays that I 'need' to put quantities on for each shuttle but I never would dream of doing that, unless asked, as I find adding in new threads is no problem AT ALL. No knots needed either.
So to work out how much thread is needed I usually tat a final motif (or whatever) having measured the thread onto the shuttles. I note the quantity on the them and then make the item. After I've finished I take the amount left over from the original quantity and that's it!!!
BUT, of course, different tatters work at different tensions so I always allow extra for 'loose' tatters. BUT I still don't think it always works!! Now I'm moaning as I hate doing that last bit for a pattern!!!!
The leaves are from Ruth Scharf's design which is to be found here although there are slight modifications as suggested by Judith Connor.

29 October 2021
A bookmark!
Why did I suddenly feel the need to make a bookmark? Simple answer is because I was running out of them in my stash!!
Why was I running out? Simple answer is because my neighbour has bought some to give as presents to her friends!!!
I think one of my favourite patterns is this one. I know it's popular with other people too as I found a stolen copy of it in a Russian book once. They'd taken the pdf file off my site, whitened out the hyperlinks and my name and published it. Flattering but it would've been nice if they'd asked first.
I've decided that this bookmark won't be added to my stash of gifts but will, instead, be given to the lady who gave me the threads last Friday. As I'm going to see her this morning I can't think of a better way to start the day.

28 October 2021
You're not going to believe this!!!
I'm not lying but this is the finished left front to my waistcoat!!!!
Yes it's curled and curled into a tube like structure!!! I've looked at numerous suggestions using Mr Google on how to straighten this up and I'm hoping that somebody can suggest the best way they've found.
The yarn is acrylic.
So, this is a summary of my search
"The best method to block acrylic yarn is with heat, no matter if the piece is knit or crochet. The heat makes the fibers more susceptible to straightening out. Steam blocking or blocking with a hair dryer yield similar results. Acrylic yarn can be blocked, and depending on the project, should always be blocked."
All comments welcome as I'm going to knit the other (right) front before I start straightening things out!!! Maybe a little heat applied to BC3 may help in future projects?

26 October 2021
A lovely present
One of the lovely ladies at the Friday knitting group gave me these balls of thread last week.
I've never used this brand before but aren't the colours yummy?
I'm going to try tatting with them but if I don't get on well with that then I'm going to use them for crochet.
I can see some little Amigarumi creatures being created over the winter!!! I still find mice round the house that I've made over the years. My problem with 'stuff' I've made is that as soon as they're finished I don't want to part with them for a while. They get put away and then forgotten. Periodically I have a look through my boxes full of tatting in the cupboard and have a session of giving the bits away. Trouble is I need to give a LOT more away or I'm going to get swamped!!!
I looked up Freccia to see what it was exactly and this is a quote from one site.
"Anchor Freccia 12 is ever popular within the crochet community, and it's not hard to see why. This fabulous high quality 3 ply mercerised cotton combines softness with strength, with a delicate sheen on each strand. Available in an incredible selection of over over 80 solid shades and over 30 multicoloured shades, each 50g ball of Freccia 12 boasts a generous 285 metres of yarn. Great for crocheters of every skill level, Freccia 12 is ideal for home decoration projects and accessories, as well as for delicate baby garments.
Please note - While this yarn does have a 3-plied-strand structure, this is not a 3ply yarn. Numbered crochet thread gets thinner as the number gets higher, with No.6 being the thickest while No.25 is the thinnest."

25 October 2021
Hat finished
Well that was a challenge!!! Now HOW can a simple hat be a challenge? Well I assure you it can when you're ruled by a BC3!!!
Everything was hunky dory until I got to the crown and the decreasing. I honestly couldn't get my head round the destructions. I think I started the decreasing three times before the penny dropped!!!!
Now I have a hat with 'almost' matching gloves. The hat is in double knitting yarn and the gloves are four ply.
Thanks to Mary J’s comment on this blog post I’ve looked into this method which I’ll be trying next time. IF there is a next time after my hassles with this hat!!!! It's the magic loop knitting method.
I've heard of and used (with great success) the magic loop with starting a crochet pattern but had never heard of this idea of knitting in the round with one circular needle. Last Friday I joined the knitting group who meet at the coffee shop by the train station on a Friday morning. I mentioned this idea to one of the ladies and she said she'd bring a piece she's knitting using this method in with her next week. Such a smashing and friendly group.


21 October 2021
Meanwhile things are speeding up!
I now know that I will never go back to my old way of knitting as I've now 'cracked' the purl stitch and am building up speed on it too. I think the main problem was worrying about how I was doing and how slow it was and once I'd decided that it really didn't matter things speeded up!!!
It's not as fast as the knit row but I'm much more comfortable with it now and rarely drop a stitch.
In the pattern it said to start with the left front but me, being me, decided that as the back was the biggest part I'd get that out of the way first!! So here it is and progress is now being made on the first front.
The good thing about doing the back first is that it's reassured me that I've plenty of yarn to complete the project. Win, win!!!

19 October 2021
This time it's a hat!
This is a hat to go with the pair of gloves I made.
A year or so ago I made myself a hat but the pattern I used wasn't 'in the round' so had to be stitched up when it was finished. I tried and tried to find the pattern I used but in the end I gave up. So I counted the stitches I'd used on my original hat and decided to knit this one to the same size.
I haven't got a circular needle short enough to use so in the end decided to go with double ended ones which I do love using.
A good start has been made as you can see but I still wanted to find a way of making the crown and needed to know how and when to decrease!!! Finally I found this pattern and it's also got the stitch count for the size I'm knitting!! Really chuffed about this!!!

15 October 2021
Another project
I haven't shown you this before because. Well I kept forgetting!!!
I was wandering around Hobbycraft some weeks ago and I spotted these gorgeous colours of yarn (purple, dark green, variegated). I tried and tried NOT to buy them but in the end I simply had to and that's when I had to make a decision on what to do with them.
I've decided to make this waistcoat (see below). The reason for a larger project like this and one that is knitted in rows and not in the round, is to make myself practice continental purl stitch. Now this isn't as easy as the knit stitch but I'm slowly getting there. I keep a crochet hook handy for the occasional dropped stitch and this is my progress (after several weeks) so far.


14 October 2021
After the fingers and thumbs
I have just carried on as I didn't want to bore you all to bits so here are the finished gloves for my daughter.
I didn't really enjoy them as they were so plain but they're done now.
Next small 'job' is a hat to go with them. Now I'm going to tackle two patterns for this. Last year I knitted a hat for myself but it was one that needed stitching up afterwards. This time I'm going for avoiding having that seam by using circular needles. That's if the amount of stitches fit on the circular pin and allow me to go 'round the bend'!!! No comments there, please as I know I'm already round that bend!!!
These are the two hats that I'm hoping to combine. First of all this one and then this one.
I think poor old BC3 is going to drive himself round the bend with all the counting etc!!!

12 October 2021
My pattern site
Well it's been six weeks of worrying about my pattern site.
You will have noticed that I use 'freeservers' as my web host and I bet a few of you thought 'good old Jane, she's got it for free'!!! Well that's not the case!! I pay for my space every two years (this time it's £105.00) and I usually hope to raise that amount from people clicking on adverts on this blog - hint, hint. Lately that hasn't happened as much as people seem to have migrated to Facebook.
Anyway, I had an email from freeservers about six weeks ago telling me to check my billing status as they were going to take money from my account on October 11th. Well I checked and horror of horrors the card I'd used two years ago was now obsolete. No problem, thought BC3, I'll just change it to my new card.
WRONG. I got a big red sentence at the top of my page telling me - well you'll see below. I tried another 12 or 13 times and each time Freeservers appeared to take 72 pence out of my bank account. Actually that didn't really happen as they turned out to be ghosts and disappeared from ‘pending’ in the account after a few days. I tried from time to time over the following four weeks and each time I got the same message. I didn't ring them (too expensive from the UK) but did email but those were only answered once a week and were no help at all.
Finally at the beginning of last week I thought I'd have a final try at updating the billing information again and much to my surprise it appears to have worked.
Yesterday dawned (11th October - pay Freeservers day) and I got a text from my bank saying that a company was trying to debit an amount of £105 from my account and told me to follow instructions - which I did very carefully as I knew who and what it was. Blow me down with a feather but my bank saw fit to decline to pay even though I’d told them to. I rang the bank and am now waiting for Freeservers (remember they don’t answer emails very often) to try again and the lady at my bank who I spoke to said that the payment would go through if requested again. So if my website disappears then you’ll all know why.
8:15 this morning and an update to the last paragraph. PAYMENT HAS FINALLY GONE THROUGH!
Meanwhile I'd decided that the winter would be spent moving the whole caboodle over to another hosting site. That's probably nearly 400 pages with at LEAST two links per page etc etc. What a waste of valuable crafting time!!!
Keep your fingers crossed that it’ll all get sorted.

11 October 2021
Monday moan
Front side/back side tatting. Is it important or not?
Personally I don't think it is. Not at all - BUT I do do it when I think it's going to be for a competition (not that I've entered one for years) or if I'm going to scan a piece for my blog (which I usually do!!).
As a lot of us give our tatting away then it's probably a good idea to do what I think is the original way of tatting - with disregard to the way it may look. That's just making the knots the same way on both rings and chains.
The point is that the receiver of the tatted gift won't know there's a 'right way up' or a 'wrong way up' and when they plonk their doily (or whatever) on a table that won't even occur to them. So I'm trying to say that it honestly doesn't matter to most people and certainly NOT to those who know little about our craft!!!
I've never seen mention of front/back in any old books or leaflets and I think it's a modern idea. Well, within the last 20 or so years.
So today's moan isn't really a moan - more a discussion point but I'd love to know what people think.

7 October 2021
Lots of fingers and a couple of thumbs!!!
Off on another glove adventure!!! This pair is already spoken for and I hope that they do finally get finished although I keep getting sidetracked by lesson plans!!!
I’m enjoying my knitting and so, so glad I decided to teach myself the continental way to 'manipulate' the needles.
I'm missing the variegated yarn, though!!! I did buy some more variegated from a lady in the market a few weeks ago but I'll probably not use it this winter.

6 October 2021
Asking questions
First of all I must thank all the Etsy sellers who I contacted over the weekend. You all graciously answered my query without asking me why I wanted to know the answer.
The reason for my impromptu research was because a friend had bought a pattern and when she came to print it it was 10 pages long although the actual pattern was on only 2 pages.
This set me off on my quest to find out the average size of patterns of the same type and complexity (small coaster/doily size). The reasoning was because from the 'get go' I've always tried sooooo hard to save on paper and ink when I produce a pattern. This has and always will be a big factor for me as we're destroying our planet and I want to do a bit to save it. I do spend a lot of time trying to fit all the instructions on as few pages as possible.
The most interesting result of my research was the number of designers who hadn't even thought about that side of things as they (like me) mostly work digitally. I haven't printed off any of my own patterns for many, many years. Several designers were very surprised to learn that people actually do print but I have quite a lot of friends who like to work from paper just like they also prefer a paper book.
One or two said that they put in a lot of instructions on how to make the pattern too. Now this is fine for somebody who is just starting on their journey in our craft but for old timers then it's so annoying. I had a pattern shown to me not long ago and because of the amount of 'help' that was given the actual pattern itself was lost and I honestly couldn't follow it. It was also in two languages as well. A great effort on the part of the designer but REALLY confusing to read and follow. I gave up!!!
Personally I think a pattern of a small coaster/doily size should be at the very most two or three pages long and just stick to giving the instructions to work the design. I don't see the point of so many pictures or explanations let alone a 'front page' and fancy large fonts. If you come across something you don't understand then just ask Mr Google or the designer for help. Also coloured backgrounds (particularly black) are a real ‘no, no’.
Just my opinion - what do you think?

4 October 2021
Difference between a mock ring & SCMR?
This question is bothering me now. Over the years the terminology seems to change for tatting abbreviations. Like the ‘ring on chain (ROCh)’ has now become a TOR (thrown off ring) which I find confusing as I always thought a TOR was a ring thrown off a ring.
Today I want to discuss the SCMR v MR. Now this is a technique that the Houtz brothers revived in their book ‘Tatting the GR-8 Self-Closing Mock Ring’ which was published in 1999 although it had been around long before that.
Now my question at this point in time is what IS the difference between a SCMR and a MR (mock ring)? OR is there a difference? Can somebody explain as I’d always ‘assumed’ that a SCMR was a ring thrown off a chain and then joined back again at the start of the chain and that a mock ring was a pretend ‘ring’ like this.
Can some expert ‘out there’ please please explain the difference as I was trying out a new pattern for somebody and the start was a ‘self closing mock ring’ and, of course, I set off but couldn’t see how the ‘ring’ was a thrown off the chain as it didn’t return to the place I’d left at the start either. So to me that would be simply a mock ring. I know that people will tell me that a mock ring is a self closing mock ring and vice versa but I personally think there should be a difference. I know that this technique can be made several ways and one way is something that I’d never considered until discussing this with Judith Connors - that is by using an swirl join or, as it’s sometimes called, an alligator join. Judith never fails to wake up my brain. She pointed me to Rhoda Auld’s method on pages 56 & 57 which is really interesting and also to Elgiva Nicholls book too although I must admit I haven’t had time to look at that yet.
It would certainly help a certain OG who is brain challenged to have a positive definition of the differences and then I can take off the technique page on my site which isn’t needed.

1 October 2021
A BRAGGING post
A post which has NOTHING to do with craft work whatsoever although I suppose it could be classed as ‘crafty’!!!
Last weekend the dishwasher died. It wouldn’t start properly but it did fill with water. It did get going once but again left a large puddle in the bottom. Time to get out the destructions (instructions!). The dishwasher is almost nine years old so there were several options to consider. Either get the repair man out or get a new machine. As we only run it about 3 times a week we also talked about whether we really needed another one.
Then I remembered my lovely friend Joan who takes computers to bits and re-builds them when necessary so I got out my phone, got onto Youtube (just like Joan does) and found a video on how to fix the machine.
Now I’ve always been really good at taking things apart (thanks to my brother who once took MY clockwork train to bits to see how it worked) but I’m not so good at putting them back together!!! BC3 can never remember where the bits go back!!
Knowing this bad trait of mine I did take it apart carefully although I struggled with the little white ‘cover bit’ that had to come out as it was in an awkward place behind another ‘black bit’. With the aid of a toothbrush (no, I didn’t steal Nick’s) and after wiggling a little round thing a bit I decided to put it all back together and try it out.
The result? Well it’s working better now than it has done for a few years. There must’ve been something in that little round wiggly thing, I think. So, £s saved and another thing to add to my list of skills!!!

30 September 2021
Second glove done!
Here it is!! What you’ve all been waiting for - or not!!! The second glove done and now they're a pair!
So, what's on the agenda next? I think another pair of gloves!!!


Subscribe to:
Posts (Atom)
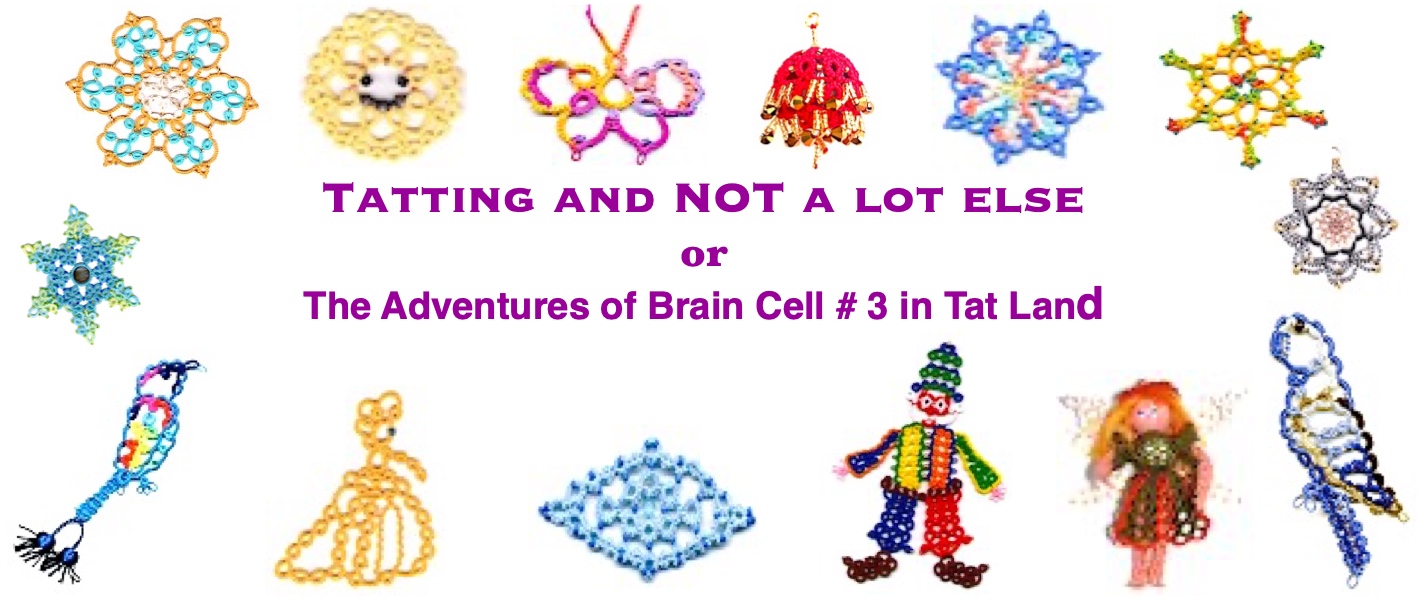
Creative Commons Licence

Tatting and NOT a Lot Else by Jane Eborall is licensed under a Creative Commons Attribution-NonCommercial-ShareAlike 3.0 Unported License.
Based on a work at http://janeeborall.blogspot.co.uk/.
Happy Beaks
I beg your pardon? I didn't quite catch what you said.