29 March 2008

Progress and lack of!!!

This is the progress on the square to fit with the diamond.
First of all there these two false starts. Where was the brain when I tried these?
Next I drew two rough ideas on the computer. BOY, were they rough too!!!! I actually used the diamond drawing and 'played' with that.

Next I tried the following but it obviously wasn't going to work but showed me a good path towards the end result. See the ghastly joins in the centre? That's cause I changed my mind!!! I then cut this piece at those joins. Can't remember why but it gave me a very good idea that if I carried on it might work out!!!

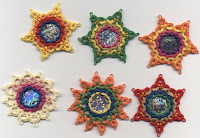
The final picture shows from left to right the progress made later in the evening. This is all to do with stitch count really. They all three look the same BUT they're not. I'm having to make the rings smaller to get the shape 'squarer' but without losing the placement of the outer picots as (at the moment) they APPEAR to fit in with the diamond. This really, really has to be tested in a largish piece to see if it will work. Do I continue with the square or start in on the triangle. All answers on a postcard, please!!!!! Or not, if you can't be bovvered!!!!

27 March 2008

Tatting Patchwork shapes

Well I had a quiet start back into 'tat mode'!! I've decided to leave aside a design I'd started on before my break (sorry, Georgia!) for a few days until I've got this patchwork phase out of my brain.
I want to do a square and triangle to go with the diamond. I looked at the diamond pattern on my site and realised that the first thing I had to do was to alter it so that it shows right side wrong side tatting. Yesterday evening I re-tatted it and altered the notation in a word document.
I then started on the square. Well, I tried!! The two pathetic attempts are not even worth putting on the scanner!!! I think the best way to tackle this is to use my drawing program and 'play' with it to make a square using the same elements. The problem I can see is making the two new patterns in the same 'format' as the diamond.
Still, knowing me it'll eventually get done I expect!!!
PS to this post. Riet's just told me about this book on tatted patchwork. I shall buy this once I've finished my square and triangle. Don't want to be influenced by anything in
Adelheid Dangela's book.

I'm BACK!

Well the patchwork is now well under control and growing daily. I'm fed up with it at the moment so in order to finish it I'm putting it down for a while! Only for a few hours, though.
While I've been working on it it's given me time to think about tatting. I NEED to tat a patchwork. OK I know I've done a diamond in the past which is here but now I NEED to make up a matching square and triangle. I think that will be the next project - starting this evening!!!!! I'm going to make tatting my evening hobby and any time I've got spare in the day will be devoted (for now) to patchwork and catching up on sewing projects (alterations etc) that are piling up.
The weather may turn a bit warmer so I can get the sewing machine out in the conservatory (with Tilly the cat's permission!) and work on HER table!!!

24 March 2008

Patchwork - 3

Another day and another 'round' if that's right!!! I can only get part of it on the scanner now. Next time I'll have to take a photo. That's if the sun ever appears again to allow a decent shot of it!!!
My finger's getting sore now so I'll have to find a thimble or return to do some tatting. While I'm sewing the tatting ideas are stacking up in the old brain!!!

23 March 2008

Patchwork - 2

Ooooh, this is fun. I do wish I could plan ahead though. There again, if I did that it wouldn't be a surprise each day, would it?
This is how far I've got now.

22 March 2008

Patchwork - 1

After well over twenty years of not doing any patchwork I found that the skill is still there!! The fat quarters that SueH sent me are absolutely ideal. Those and an 'out of date' Woolworths catalogue make ideal companions. I've no idea where this is leading - I've just started and am going to use my usual methods of 'hit and miss'.

21 March 2008

Diane's TIAS and further ramblings!

Well I've finished the TIAS along with lots of othern people too!!! I enjoyed doing this a lot.
Now I have an announcement to make. I have decided to give up tatting for a while.
I collected lots of books while I was working so that I'd have 'something to do' when I retired. Books on all sorts of crafts and now that I've been 'retired' for quite a few years I'm going to start looking at them and doing something else for a change. Not sure quite what just yet but a return to hand sewn patchwork is probably the first stop.

SueH sent me some lovely 'fat quarters' a few weeks ago and my fingers have been itching since to do some sewing since they arrived. Problem is that the templates that I really want to use have 'gone missing'. Either that or I've been robbed again!!
Since starting this post yesterday I found a new packet of unopened templates that I bought when a local shop was closing down about thirty to forty years ago. There is a diamond, a square and a triangle in the packet so that's what I'm going to use. The hexagon template (which is missing) is probably too small for me until my new specs are ready. It's only 3/4" in diameter.

I know what I'm like - as soon as I get started on this new project I'll think of some tatting that 'needs doing'!!! I'll post as I go along on this so the blog won't be quiet!! I wonder whether this will come under the 'nothing much else' remit as in the title of the blog???!!!!

19 March 2008

Not a TIAS but a 'Share a Tat'

Nowadays it's becoming more and more difficult to come up with original ideas and sometimes it's nice just to do something simple.
So the sequins I've been re-visiting after several years are really simple. I think this may be a good time to introduce a 'Share a Tat' game!!!!
What I intend to do is to post the way I've found of enclosing the sequin and perhaps one or two of the patterns I've done - just to give some idea of stitch count etc.
I'm NOT going to add any copyright notice to these as I don't feel that they're 'important' enough and it will allow everybody to play the game.
I will then invite all and sundry (especially new tatters) to join me to discover as many ways as possible of making this into a motif, mobile, etc. Note, I haven't added any beads or used techniques other than rings, chains and split rings so there's room for plenty more ideas!!
I am more than happy to 'host' any patterns derived from this on a new 'guest' section of my pattern pages, or add links to other pages on other sites. I would only ask that if you write your patterns a different way to the way I do that you alter the original accordingly and add any new abbreviations. This will make it clearer for those wanting to tat them. My way of writing patterns is not necessarily everybody's 'cup of tea'!! I will not be adding any copyright notice to my patterns but you are welcome to add it to yours.
It would be very interesting to see how many different ideas can stem from one sequin. Not as many as there were hippos!!!!
I hope to get the pattern up on my site tomorrow and will let everybody know when it's there. You will need sequins measuring 7/8" in diameter.
Here is another idea but no pattern to go with it!!!


18 March 2008

Back to the sequins

I need to work one or two more of these before I start on another crazy idea!!! Yes, it will involve all who want to 'have a go'!!! No, it's not a TIAS as it will be 'sequin related'!!! For those who may want to take part or those who want to have a go at the ones I've already done then you'll need sequins, thread, beads etc. The sequins should be 7/8" in diameter.
All will be revealed once I've sorted the only two brain cells out which I've got left!!!

16 March 2008

Sunday!

Well I didn't pick up a shuttle at all on Saturday. Too much going on here. BUT yesterday was quite the opposite. I was chosen to be one of the demonstrators for the Ring of Tatters at the NEC. For those who don't know - this is the National Exhibition Centre here in the UK. It's a huge site with about eight very large halls where exhibitions are held.
From Thursday to Sunday of last week the
Sewing for Pleasure and Hobbycraft exhibitions were held in adjacent halls. The site is about 25 miles from where I live. The Ring of Tatters are given a stand at this exhibition purely to demonstrate and teach people who want to learn or who want to know more about our addiction! This is always a very busy and happy day - meeting up with friends on the stand and often friends passing by. We take some of our tatting with us to decorate the stand and then assist as and when needed.
This year
Rosemarie Peel was there and I asked her how her new book was coming along! Life seems to be delaying the much awaited next book from Rosemarie.
Michelle Roebuck - the editor of the Ring's 'new look' newsletter was there too. We had a good natter about Diane's TIAS and both of us admitted we were flumoxed about what it was going to be!!!
I was very good and didn't come home with any beads OR threads. I'd told myself that I didn't need any more threads or beads and for once I actually listened and took note!! BUT I did come home with a new gismo for loading beads onto threads. It's a bit like this but the one I bought is is a small plastic one. What I did buy to go with it is a 'bent' long (very long) needle to go with it. I'll show you when I get a chance to take a photo of it.
I got home at just gone six o'clock. Totally tired, with a sore throat (too much talking!) and a thirst which needed quenching with a large glass of red wine!!!

14 March 2008

Playing with sequins!

A few days ago I posted some pictures of sequins that I'd played with some years ago. I showed the backs too where I'd tried another way for 'one sided' viewing. The originals that I made had two separate rows of split rings (one at the front and the other at the back) which were then joined with the outer row. This obviously took a bit of time to do as there were two 'cuts and ties' etc.
Yesterday I finally sat down to write this pattern. I may have it somewhere on my main computer but by the time I settled into 'tat corner' in my comfy chair I was on my laptop.
Then a thought occurred to me. I wonder if both 'sides' of the enclosing rows could be worked in one 'hit'. Surely it could.
Well, ta de dah. Here's the second attempt which will form the basis for the next round or rounds.
I'm not sure quite how the rest will work out but the 'creative juices' are not as dozy as they were!!!
Below I have shown the original with the back which makes the use of the sequin 'decoration' one sided. Next is the one side of the new version and finally the other side of the new version. Originally (and I can't find any samples) both sides looked like the new version but were made separately.
I now intend to play with this as I can feel a wealth of ideas creeping up on me!!!

12 March 2008

A new thread

On Monday a small unexpected package arrived for me. I LOVE surprises and what was even better it was a ball of thread. Jenny Griffin sent it as a 'thank you' for doing the TIAS.
I'd never seen or heard of this thread - it's brand new from Coats in Germany. It's called Anchor Artiste and this particular ball is a number 20 and holds 20 grammes.
The colour is a very yummy variagated lilac. I worked up a bookmark using it alongside a Manuela thread. I would say that it is exactly the same as Flora and not as 'harsh' as Floretta. The only snag I can find is the price which I found it listed on one site.
I'm not giving the link to that site as I'm hoping that others will sell it a bit cheaper. Hint, hint to any thread suppliers that are reading this!!!
Here is the bookmark I made!!!

11 March 2008

Bracelets

I love bracelets. I don't often wear them in the winter but in the summer I love bracelets (oh, never forget the earrings!!!). I looked again at the bracelet I made the other day and thought that I'd make one more to get this 'phase' out of my system. I used black, white and cream with a very pretty and shiny black button in the centre. I do hope I can now kick this one out of the window for a while and start on something new. Maybe think about another TIAS. So enjoying doing Diane's, though.

10 March 2008

Easter!

This is just a small chick in a basket I did yesterday. I remembered to write it down (well, roughly!) as I went along!!! Perhaps, if I did it again, I'd put the eye in on a drop picot but as I did it last thing in the evening it was whatever came into the tired old brain at the time!!

9 March 2008

I've not been robbed!

I found the catches. Finally after yet another search they were exactly where I'd put them!! I just didn't think I'd have put them with the magnetic beads!!! I can't think why I didn't remember but as I have a poor memory (and always have had!) I'll put it down to that!!!
This is what I made once they'd been found!!! I used the pattern for the letter beads and added 'ordinary' beads instead!!! The worst part of working this pattern for me is doing the maths on it!! I've never been comfortable with numbers!!! Also it would help if I could read a pattern. My own, believe it or not!!! I just tend to assume I know what I'm doing and forget to stop and read the instructions!!! I'm going to do another today - just to be sure that I know what I'm doing!!!!

8 March 2008

I've been robbed!

I know some of you will sympathise and some of you will giggle but I'm sure I've had burglars in the house. Either that or this house just deliberately hides things!!! I've spent two hours in my stash cupboard looking for some magnetic catches which I KNOW I've got in there somewhere. I'm beginning to think that there's been somebody in the house (probably during the night) who has stolen them. Nick wouldn't dare and Tilly the cat wouldn't be interested but ...... I can't find them. Anyway, I did unearth some sequins!!! I am hoping to get back to playing with sequins again. I spotted my tatted bag during my search too and also remembered the sequin mobile and tatted box that I did in the past too. So, after making another bracelet this evening (as if I NEED more bracelets!!) I shall go back to playing with sequins!!! The first picture shows the 'right side' in this experiment and the second shows how I covered the sequins when the back wasn't going to show (as on the bag). With the tatting bag I think I used a different outer round.
I do wish I'd written it all down!!!

6 March 2008

Happy Beaks!

OK, hold on to your hats - here is the biggie that's kept me quiet for so long.

I have been asked on numerous occasions by many people (including him wot must be obeyed) if I could do a penguin. You'll see why I've taken such a long time over this. 8 different penguins!! The collective nouns for penguins are so many (parcel, rookery, creche, huddle or colony) that I couldn't decide what to call this 'lot'. In the end I decided to call them 'Happy Beaks'. Well we've all heard of feet being happy, haven't we?

I started on the front facing penguin (large) and then decided I needed a small one. Trouble was that they needed to be able to 'look' at each other. I did these and then it was a natural progression to 'need' to do the large and small ones facing the other way! Duh, what a hassle!!!

During my searches of google images I found the sideways facing penguins were interesting but also complicated. The white and black fascinated me as it would be a challenge to use them in the 'right' amount and places with as few starts and stops as possible (well, you know how I hate finishing off ends!). Again, having done the large ones the challenge to do the small ones continued. I will admit that the final penguin (the small one facing sideways and to the left) proved to be the hardest. I think that's because I was really fed up with them all by then.

Finally mounting them all. Another story.

In our smallish town there is still a store which sells fabric. A family run concern which caters for the 'up market' people in the area. I have very little luck there when it comes to haberdashery or fabric. Still, on Tuesday morning I wandered in there on the 'off chance' that I just might find the right coloured fabric for the penguins. Imagine my surprise when on the top of the remnant bin I found the two colours and weights of fabric I needed. YIPEEEEE.


The patterns for all these penguins can be found from my home page.

First of all here they all are out and about in the snow with the stars twinkling.


Here are the two adult penguins who's bodies are facing forwards but with faces looking to the left or right.


Next are their two babies (I think they belong to those adults - but maybe I'm wrong!).

Next are the sideways facing ones. These are the adults.

Finally there are two small penguins which also face sideways!

Many thanks to Sharren Morgan for test tatting the first 'batch' - she happened to mention she liked penguins and asked if I'd thought of doing one while we were 'chatting' one day!!! As I was in the doldrums of designing this pattern she got 'chosen' to help!!!

5 March 2008

Finished!!!

I've finished it!! Every part and there are 8 parts!! I'm mounting it at the moment. Yes, me, mounting something. If I hadn't then all the pieces would get lost. I've made it into a picture and hope to put it on the blog either later today or tomorrow.
I'm really, really pleased with the result. I asked Dom the artist who lives next door to help me arrange the bits and he just moved them slightly from where I'd put them to form a grand design. I do hope that it will be liked as it's taken such a big part of my tat life!!!
Right, off to finish it and throw an iron over it!!!!

3 March 2008

Further progress

I still have two more parts to resolve of the 'biggie'. It's driving me round the bend now!! It may be ready by the middle of the week and when it is I'll hopefully be able to post pictures here and add it to the pattern site. I've been very 'good' this time and kept up the drawings along with the text. If only I hadn't changed my mind about half of it then ........
The saying goes 'a lady is entitled to change her mind'. Trouble is - I'm no lady. Just a Jane!!!!

2 March 2008

Still here

I'm still here and still tatting. I'm 'just' over half way through my big project. All was going well until I decided to make a small amendment to parts of it yesterday. Oh, wrong, wrong, wrong!! OK, it'll look better in the end but the hassle of altering everything does make me wonder sometimes - especially as those I'd shown the first tryouts to said that it looked fine as it was!
I was 'interrupted' last night by having to go and babysit. Must admit that this is no chore and that the boys love me looking after them. Couldn't be because I let them stay up and read lots of stories to them, could it?

29 February 2008

Sharren's Angel

I've tested Sharren's angel and it's a darling to do. You need to know the split chain and the SCMR. The split SCMR is drop dead easy too. Here's my test tat.

28 February 2008

100 today!!!

100 done and tat's the end of tat for a while!!! This is what I've been tatting.
Now I can go and play with my other big project after I've done one more test tat for somebody else!!

26 February 2008

Thoughts about time and tatting

The hardest 'job' I had with time was adjusting to being retired. For all my working life my main ambition was to retire. I worked full time as a teacher (mainly the five year olds) at the same time raising two kids with an ex who was more often than not away on business or with his stupid hobby. After the teaching I then did temp office work. I rushed from place to place (mainly on my bike) sometimes working three jobs in a day.
Thus retirement was a pot of gold at the end of the rainbow.
BUT when I got there it took me several years of self training to manage the time I supposedly had. I couldn't get it through my thick skull that I could read that extra chapter or three in bed in the morning and that I didn't have to rush around anymore. I'm there now and the only rushing I ever try to do is to appointments.
What I suppose I'm trying to tell you is that I love having too many tatting projects 'on the go'. I'm in my element at the moment although my own projects are having to wait a week or two.
Yesterday evening (no tatting in the afternoon as I was helping a couple of friends out with computers) I did another 20 of the small snowflakes - tat's now 72 completed.
Towards the end of the evening I had an email from Iris. She's asked me to test tat a pattern for her. Now, who could resist that? Well I had to at that time of the evening as I think I need a well rested brain to do it!!! Also I will have to get into my tat cupboard to find beads etc!!!

So the list is sort of not getting any longer but also not getting a lot shorter either!!!!
Isn't life good? I've never been bored in my life and as long as I can manage a shuttle I'm sure I never will be!!!!

25 February 2008

Woweeeeee

I couldn't resist making the kit that Lyn from Tatting and Design sent any longer. It's been sitting on my tat table looking at me and tempting me since it arrived so yesterday afternoon I tatted these two dear little motifs up. I'm not sure if she sells these little kits but if she does then I'd recommend them to anybody and everybody. I do so love the thread and the beads.
The list is dwindling now. 52 snowflakes done and I feel that today should break the back of them. Hope to reach 70 by the end of the day!! Phewwww.

24 February 2008

The list!

Well I forgot to add one more thing to the list yesterday - a couple of pendants.
When I was at the Lace Fair last November I met up with Lyn Morton. I couldn't take my eyes off a pendant she was wearing. I asked her what thread she had used and she told me it was some of her
Oren Bayan metallic thread. Of course that made a dent in the purse!!! Anyway the other day I realised I was running out of the colours I need for my large WIP so ordered some more from her at Tatting and Design. What did the dear lady do? Not only sent my threads very quickly but also gifted me a kit with the pattern, thread and beads for the little pendant. Now I HAVE to make those sooooooon. In fact, I might take 'time out' from my list this afternoon to make them!!! Well, you have to, don't you? I'll show them tomorrow if I get them done.
Back to the list. In spite of a relatively busy day yesterday I managed to get the bracelet done (see below). I also posted the 25 garlands which I'd completed as my friend wanted those urgently. I also got another 15 of the snowflakes done too and also 'timed' them - ten minutes each (with no interruptions). I can relax on those when I've got past the 60 mark!!!

23 February 2008

My tatting list!

The reason I've nothing to show at the moment is because I'm 'quite' busy!!! This is what I've been doing, or have left to do over the past week or two or three!!!
1. Test tatting for Martha Ess's new block tatting book or books. Done and dusted! Can't wait to see it in print.
2. Working on a very big pattern which has involved lots of 'parts'. Still a WIP!!
3. Test tatting for Hope Green (I think she's submitting it to Palmetto tat days). A smashing little butterfly which had me reviving my long lost (about 40 years ago!) knowledge of hair pin lace.
4. 25 large garlands for a friend. These are 10 rings and chains and each takes about 20 - 30 minutes each. Done and dusted and in the post this morning. That was urgent!
5. 100 large snowflakes (well, not that large - 5 rings and 5 chains) for the same friend. Still a WIP with only 10 completed.
6. Bracelet for a friend of my sister. Thread, letters, beads and bits sorted and ready to go. May take a break from snowflakes to do this today.
7. Playing with angels. Naughty of me but I needed to get the idea 'out'. Still a WIP as the pattern has to be tested again and drawings done!
8. Something else - not telling!!!!
9. Forgot - also test tatted another pattern for a friend who is going to submit it to Palmetto Tatters for their tat days. This is another little gem too. Done and dusted.
Still to come, I hope, is some test tatting for SueH. Everything else will be put to one side to do this when she sends it.
PS I forgot to say that I'm also doing Diane's TIAS too!!!!!

21 February 2008

Angels keep arriving!!

Well it might have taken me several years to do the angel for Sally but now I've started I'm finding it hard to stop!!!

Anybody who's ever tried to 'adjust' a pattern will know that it's not easy. First of all it's easy to adjust stitch count when working on a small motif like this. BUT this doesn't always make a big enough difference to the finished size. On this angel I've not only adjusted the stitch count but also knocked out entirely some of the split rings. To keep it balanced was then another consideration.

This one will fit into a 2 1/4" bangle so eventually people who want to make it will have a choice. You'll also see that in the centre of this angel there is a teardrop bead (plus two seed beads). This will give an alternative way of working BOTH angels without necessarily meaning people have to find and buy the heart shaped beads. An ordinary round bead will do just as well and I still have to work the larger version with the round bead and put the text for that into the pattern. Alternatives, that's what it's all about - alternatives. By doing this I hope that the pattern can be worked by anybody with 'normal' tatting supplies!!!! By that I mean a lot of beads, threads and bangles!!!!

Meanwhile this blog just MIGHT be quiet for a while as I have a lot of motifs to make for a friend. I'm still working on a big, big project which is nearing completion and which I'm very excited about. The angels were just a sidetrack from my 'real' projects!!!

20 February 2008

Another angel

Thanks to all for explaining HDT (hand dyed thread). The penny dropped as I got into bed last night!!! I'll have to get me some - one day soon.
I feel another angel like Sally's 'coming on'. I would like to do a smaller pocket sized one and also another like the first one but with an 'ordinary' bead inside!
While I'm nattering on about angels I must show you this.
Remember me playing with the split SCMR? Well Sherron Morgan and I are still discussing this as she 'got there' before me last year. I've managed to persuade her to do a !!! to submit to Palmetto tat days and she's also sent me the following angel that she did. She said that she'd only played with it and used thread that was on the shuttles to make it. Hmmm, I know the feeling, Sharren!!! I think this is going to make a lovely angel so showing you (with Sharren's permission, I might add!!) might 'force' her into writing it down!!! Hey, Sharren, get the hint?!?!?

19 February 2008

Sally's Angel - finished

The angel is finished. I realised the night before last just as I was falling asleep that I'd done the first half of the notation all wrong. Not a lot wrong but all wrong. I'd looked at doing it from the backside point of view when it could easily be front sided!! Took all of five minutes to sort out in yesterday's allocated 'tat time'.
I asked Sally what colours angels were but she said she'd never met one!
I also haven't a clue as to whether they are women or men so I decided to not make up my mind!! I do have such huge arguments with myself so tat's why this one is mixed gender!!!!!
If anybody does have the answer, please let me know as I'd like to make some more and list them on ebay.

16 February 2008

Sally's Angel - Eureka!!!

I think it's finished. Well, apart from more testing and tweaking. I've only shown a few of the trials I've done of this but it's been a nightmare. Finally I started in another place to get this one!!! Sally suggested that the wings coming out by the neck were probably half the problem!! SO right. This meant a whole re-write. Thank goodness for copy and paste in word processing and a long cold day here in the UK!!!
I've only roughly tied her into the bangle but I'm so much happier with her. Not sure whether to do the wings differently. Again Sally and I discussed whether to make them rings and chains. I may try that as an 'alternative' idea although I do love the effect of these lock stitch chains in two colours.
Oh, I also left off the fingers too on this one!!
I've scanned her twice so that if you look at her carefully you'll be able to see all the little faults that may need correcting. I'm not sure about the halo either. Should it be bigger/smaller, come from another place or what?

15 February 2008

Sally's Angel - part 3

Well this relatively simple angel has caused a lot of problems! I wasn't at all happy about the neck/head/body region so thought I'd start from a different place!!
Originally I'd started with the body ring which was attached to the bead and then worked the arms, first wing, skirt, second wing finishing with the head.
Next I tried starting with the head, following with the same order as before. Nope, tat didn't work either.
This time I started with the arms then the body ring (joining to the bead as before) followed by the head, first wing, skirt, second wing finishing back at the neck. I think this gives a much better look to the whole design. I now am happy with the head and the skirt (apart from a little more tweaking) and the arms (still wondering whether to 'do' fingers or not). The only thing I'm not entirely happy with is the wings. I like the lock stitch chain but I'm not totally happy with it yet .............
Ah, the surprise is that it will fit snuggly into a 3" bangle. Sorry, Sally, is that too big for you? I will try for another smaller angel when I've got this one sorted out!!!
All suggestions will be welcome!!!
Now I'm happy to go back to my big project for a while!!!

14 February 2008

Sally's Angel - part 2

Life has been hectic the past few days. I've got the last few Aero shuttles listed on ebay and have a stinking cold too.

The angel is progressing in forward and backward leaps! I am also working on another large project too - no, sorry, not another TIAS yet but that is rapidly approaching on my list.


Back to the angel. This is the latest version. The head of the last one was too small but I've a feeling this one is too big. The halo is OK, I think!!! I've made the body above the bead smaller and also added two more SR's to the arms so that they have more 'definition'. Not sure that the hands really need fingers either. The lower wings have gone and that's made the whole thing better by a long way.

The skirt is slightly wider with an interesting further addition of anther ring and beads. I shall add beads to the bottom corner SR's too and maybe make them (the SR's) a little larger!!

The wings are dreadful. I mean - truly dreadful so I may have to resort to another long think about them. Not sure they need to be small SR's but maybe just a zig zag chain as opposed to a lock stitch chain. Maybe even an 'ordinary' chain with a picoted ZZ one in the middle. Goodness knows. I may take another shot at this tonight. I think the size will be fine for the bangle which I threw onto the platten with this sample. Whatever - it will be a quick and easy one when it's finished and I hope to be able to suggest other types of beads to use too (like teardrop ones)!!!

12 February 2008

Sally's Angel

My poor sister has been 'nagging' me for a year or more for an angel to fit in a ring!! I've tried 'adjusting' several other designs but couldn't quite get them right!! The only thing to do was to start from scratch myself!!! I've already got a good supply of these little heart beads so that seemed a good place to start!!!

Below is the first 'real' finished angel (scanned on both a white background and a black one). Not sure that I really like it yet. The lower wings are (I think) a bit 'too much' and will probably be left out in the next version or adjusted to come lower. The arms and hands which go round the bead are also not 'quite right' so probably they need adjusting too - maybe it's just the colours are the wrong way round. I like the head and the skirt. It's a reasonable start and I will get back to it so that we've both got a Christmas giveaway in plenty of time this year!!!

11 February 2008

More on the split SCMR

This is an attempt (and a very good one too) that Gina Oschmann who is one of Riet's guild sent in. Riet said the following.

Gina Oschmann , one of the members of the guild tatted chalenge number three she mailed it to me on saterday afternoon, but there was a problem with the picture, this morning she mailed the picture for the third time and now I could open the picture and could see what she did.
She started with a splitring, in the first part of the splitring an inwards picot (2 firsthalf ds - 2 second half ds) in the second half throw of rings and a join with bead the join is made with the shuttle thread by tatting first 2 second half ds make the join and 2 first half ds.
To write down the pattern is difficult, but I will try
Sp1 is dark blue,
Sp2 is light blue.
Sp1 SR: 3ds, 2(firsthalf ds), - 2(second half ds), 3 ds /
4ds, [R1: 4-4], 3ds, 2(second halfds) +b 2(first half ds), [R2: 6-6], 4 ds [R3: 4-4], 4ds cl RW
Ch1: 7ds RW

SR: 7 / 7 cl. RW.

Ch 7
go on with second eye in mirorlook of first eye and the hair are chains with long picots.

I'm not sure if this is the way that I did it as there doesn't appear to be a split self closing mock ring here but it certainly gives the same result.


10 February 2008

Split SCMR

Katie Verna had a look at Sharren's bookmark and decided to 'have a go' from just the picture. Well done, Katie. This is what she said and her picture too.

"I tried the Sharren's flower that you posted yesterday on your blog. When I read about it, I didn't think I could do it, but in trying I understood. Thanks to you and to Sharren for exploring this crazy, lovely little technique. I always have trouble figuring out how much thread to leave for the
split chain, but this one worked out. I think the secret is that you can always stretch the thread a little, but you can't shrink it."

8 February 2008

The answer - part 2

Sharren Morgan (one of the Palmetto Tatters) mentioned the other day that she'd played with this idea. She sent in one of her pieces this morning for me to see. It's SO neat it makes me hang my head in shame. Anyway, I couldn't work out how she'd done hers so the following is her explanation. Do hope she writes this pattern down and uses it as it would make a really good lesson.

"I started opposite the tail with a small split ring. I did the red side as an SCMR, throwing off rings that I joined together, then did the split part in white and mirrored the throwing off rings and joining them together. I finished with another small split ring, then did the tail. I had one that's been long since given away that I did in a single color. "

7 February 2008

The answer

It's a split SCMR? At least I think that's what I'd call it.
I found myself in the situation the other day when I needed a split SCMR!! Now we all go through phases, I'm sure, when we really, really, really need a split SCMR!! I wondered if this was feasible and it certainly is.
This is how it would work.
You make the SCMR as you would normally but when you come to close it you pull the loop up as usual BUT leave a gap at the base. You need to be sure to hide the loop back near the base of the left hand side but this is really easy.
Next you work back over the space you've left using a split chain. Is this a new idea or am I re-inventing the wheel once more!!!
Below are two drawings that I've done to show what I'm talking about!!!!
I know this isn't 'rocket science' but I think it may come in useful - one day!!

6 February 2008

Another suggestion!!

This is from 'Dani the geek'.

It looks like the eyes on the face and the top bead on the middle motif were done the same way. I'm suggesting that first you made a split ring with a bead on the core thread. then you took your core thread and (taking it off the shuttle, if, indeed, you had a shuttle to begin with) pulled it through the bead again in order to make a second split ring. I tried to make it look like a more complicated technique, but this brute-force ways seems the most fitting. (bigger pictures would help!) Thanks for the brain food, I need all I can get about now!

Tomorrow I will 'tell all'.

5 February 2008

Babette's way of working the doodle

The following is how Babette worked the little doodle on the left. It's not the way I did it but it's another way. Thanks for taking up the challenge Babette. Anybody else got any ideas?

Using your colour scheme: Started first green chain using a safetypin to leave vsp made chain of 3ds p 3ds, then turned and made white chain with picots and the centre thrown ring. Joined white chain to starting vsp of green chain. The rest was straightforward chains, split rings and normal rings, making sure the lower two rings were joined to the same picot. Perhaps you could put these notes into a more comprehensible set of instructions.

Once I had enlarged the picture of your doodle enough to see exactly where the picots joined the rest was quite simple, only the actual stitch count eluded me as the picture was not clear enough for an accurate count.

Another message from Babette on the third one (the face). She says -

Bearing in mind it’s 35deg C outside, England v NZ 20/20 is on television and we are almost through the 2nd bottle of wine (a woman after my own heart!) and supper has not even begun yet.

I roughly made motif in two parts. The first with two colours, the split ring, four small rings and 5 downward picots, the 5th also the join/finish. Second part with two shuttles wound with pink thread, joined at finish of first part, then chains and joins up to the first two small rings. Then split chain with split ring joining next split ring and split chain before finishing second side to match first, joining beads where shown. Very rough and ready description of method and probably more complicated than your original but it worked. The motif is not worth scanning in primarily because I was not particularly accurate on stitch count, picot size, tension and finishing off the threads.

4 February 2008

Some ideas about how I did tat!

This is what Babette Garman sent me.


I'm waiting to hear from her again to find out how she did hers as it looks so very close. It must be remembered that there are always many ways to 'skin a rabbit' and that sometimes the same results can be achieved by other methods.

There have been lots of suggestions about how I did it and the only one to get it right so far has been Sharren Morgan. She's already played with this idea before and I'm hoping she'll send me copies of what she's done.

3 February 2008

How did I do tat?

Three examples of something I've been playing with.
Challenge - how did I do tat?!?

Creative Commons Licence

Happy Beaks

Happy Beaks
I beg your pardon? I didn't quite catch what you said.